Finding the Pis on the network
Now that we have our Pis booted and up and running on the network, we need to find them to configure them further.
This is a post in the "Brambleweeny Cluster Experiments" series of blog posts, which accompanies the YouTube live stream recording playlist of the same name. The video linked here is the one that accompanies this blog post.
Previous post in this series: Preparing the OS image
Next post in this series: Initial Pi configuration via Ansible
Having booted the Pis in the cluster using the OS image prepared earlier, we now need to find them so that we can continue with the setup.
What does that mean? Well, the Pis will have requested IP addresses via DHCP. In my case, I run DHCP via my Google Wifi setup, and have a range set up for DHCP leases. While I can guess what the IP addresses might be, it's not scientific. I could look at the Google Wifi app on my phone, and go through manually searching for the devices that called themselves something that includes the string "raspberrypi", then looking at the details to reveal the IP addresses. But that sounds too much hard work, and not something I'd learn from.
Using nmap
I could use the nmap command that Alex uses, which has a wealth of possibilities. If all I wanted to do was to find the IP addresses, this would be what I'd want to use, specifying the -sn option (which means "don't do a port scan", previously the option was -sP) for my home network (192.168.86.0/24), which would give results that look like this:
-> nmap -sn 192.168.86.0/24
Starting Nmap 7.70 ( https://nmap.org ) at 2020-03-22 17:08 GMT
[...]
Nmap scan report for chromecast-audio.lan (192.168.86.43)
Host is up (0.037s latency).
Nmap scan report for amazon-517762033.lan (192.168.86.47)
Host is up (0.10s latency).
Nmap scan report for pimodelb.lan (192.168.86.49)
Host is up (0.0022s latency).
Nmap scan report for 192.168.86.15
Host is up (0.026s latency).
Nmap scan report for raspberrypi.lan (192.168.86.54)
Host is up (0.0039s latency).
Nmap scan report for 192.168.86.47
Host is up (0.0033s latency).
Nmap scan report for 192.168.86.125
Host is up (0.0023s latency).
[...]
Nmap done: 256 IP addresses (28 hosts up) scanned in 2.38 seconds
->
If you're wondering about the way the network is written, i.e. 192.168.86.0/24, here's how that works. An IP (v4) address is a dotted quad number, i.e. four single byte values (range 0-255) that specify a combination of network number and host number. The number after the slash (24 in this case) tells you how many bits wide the mask for the network number is, with the remaining bits being the host number. Bearing in mind that the resolution of four bytes gives a total address space of 32 bits (4 x 8), 24 signifies that the first three numbers (192.168.86) represent the network number, and the fourth represents the host number(s).
This is how I see 192.168.86.0/24 in my mind:
     192      168       86        0 decimal
11000000 10101000 01010110 00000000 binary
11111111 11111111 11111111 00000000 network mask (24 bits)
|                        | |      |
+------------------------+ +------+
            |                 |
          network            host
Given that I can work out what IP addresses might already be allocated on my network, I could eventually reach the conclusion that the following IP addresses were the four new Pis in the cluster: 192.168.86.53, 192.168.86.54, 192.168.86.55 and 192.168.86.56.
But that feels a little fuzzy to me.
Moreover, I'm learning about Ansible from Jeff Geerling, as I mentioned in Starting out with Raspberry Pi experiments, and want to use some of the Ansible goodness for the setup of the Pis, as explained in his wiki page Network the Raspberry Pis. Jeff has a nice networking setup section in his GitHub repo geerlingguy/raspberry-pi-dramble which I recommend you have a look at. In this networking setup he has a playbook (a series of tasks for Ansible to carry out on a set of remote hosts) main.yml that sets up networking, including allocating specific IP addresses to specific hosts.
How are these hosts identified and defined? In a vars.yml file, an example of which is provided in that networking setup section. It contains a mapping of MAC addresses to hostname and IP address pairs, which is exactly what I want. In other words, I want to give each of the Pis in the cluster a hostname, and a specific IP address that will persist and that I can remember.
I'm going to jump ahead and show you what's in the vars.yml file for my Pi cluster setup here:
---
# Mapping of what hardware MAC addresses should be configured with specific IPs.
mac_address_mapping:

  "dc:a6:32:60:60:95":
    name: brambleweeny1.lan
    ip: "192.168.86.12"
  "dc:a6:32:60:60:77":
    name: brambleweeny2.lan
    ip: "192.168.86.13"
  "dc:a6:32:60:60:44":
    name: brambleweeny3.lan
    ip: "192.168.86.14"
  "dc:a6:32:60:60:e3":
    name: brambleweeny4.lan
    ip: "192.168.86.15"

# Nameservers to use in resolv.conf.
dns_nameservers:
  - "192.168.86.5"
I want to give the four Pis host numbers in the range 12-15, and name them after the cluster name "Brambleweeny". I also want to tell them to use a local DNS server at 192.168.86.5 for domain name resolution. This is a tiny Raspberry Pi Zero W running the excellent Pi-hole.
But putting aside the IP addresses for a moment - how did I find out the MAC addresses?
Using arp-scan
Well it pleases me to say that I found them out using a bit of technology that dates back to the early 1980s, and relates directly to one of the fundamental and critical parts of the Internet protocol suite - the Address Resolution Protocol (ARP). Essentially, ARP provides a mapping between the link layer address of a network device (i.e. a MAC address in this case) and the internet layer address (i.e. the IP address in this case).
To work with ARP data there's a venerable program called arp-scan which is standard on real operating systems such as Linux. It's a system binary, which means it lives in /usr/sbin ("sbin" is short for "system binaries") which means, more or less, that it's for root use only.
Running arp-scan on this network address 192.168.86.0/24 reveals almost exactly what we're looking for: not only the MAC addresses, but the IP addresses that are associated with them.
Here's what the output of running arp-scan on my network looks like (I've modified parts of the addresses for security reasons):
-> sudo arp-scan 192.168.86.0/24
Interface: eth0, datalink type: EN10MB (Ethernet)
Starting arp-scan 1.9.5 with 256 hosts (https://github.com/royhills/arp-scan)
192.168.86.1    70:3a:cb:2e:c5:fb       (Unknown)
192.168.86.22   70:3a:cb:32:0a:38       (Unknown)
192.168.86.32   00:26:2d:18:d0:12       Wistron Neweb Corporation
192.168.86.31   00:0e:58:68:59:33       Sonos, Inc.
192.168.86.33   f0:72:ea:30:59:e3       (Unknown)
192.168.86.37   64:16:66:40:5f:c3       (Unknown)
192.168.86.36   6c:ad:f8:6c:5a:3d       AzureWave Technology Inc.
192.168.86.39   18:b4:30:ec:11:2a       Nest Labs Inc.
192.168.86.39   18:b4:30:ec:51:2a       Nest Labs Inc. (DUP: 2)
192.168.86.28   00:0e:58:8a:c6:92       Sonos, Inc.
192.168.86.15   dc:a6:32:60:60:77       (Unknown)
192.168.86.47   dc:a6:32:60:60:95       (Unknown)
192.168.86.48   9c:32:ce:7e:15:a1       (Unknown)
192.168.86.158  dc:a6:32:60:60:44       (Unknown)
192.168.86.125  dc:a6:32:60:60:e3       (Unknown)
192.168.86.20   6c:56:97:64:1d:6f       (Unknown)
192.168.86.47   fc:65:de:08:1b:69       (Unknown)
192.168.86.44   f4:f5:d8:ed:13:fa       Google, Inc.
192.168.86.43   54:60:09:eb:1a:dc       Google, Inc.
192.168.86.21   a4:77:33:25:13:14       Google, Inc.
192.168.86.187  5c:aa:fd:24:11:84       Sonos, Inc.
192.168.86.24   3c:15:c2:b3:10:03       Apple, Inc.
192.168.86.29   20:16:b9:c2:1d:f1       (Unknown)
192.168.86.250  5c:aa:fd:02:15:48       Sonos, Inc.
192.168.86.26   20:df:b9:41:1d:24       (Unknown)
192.168.86.35   00:0e:58:f3:1e:6c       Sonos, Inc.
192.168.86.40   1c:f2:9a:64:1c:22       (Unknown)

29 packets received by filter, 0 packets dropped by kernel
Ending arp-scan 1.9.5: 256 hosts scanned in 4.639 seconds (55.18 hosts/sec). 27 responded
->
Gosh that's nice, but how do I tell which are my new Raspberry Pis in the cluster?
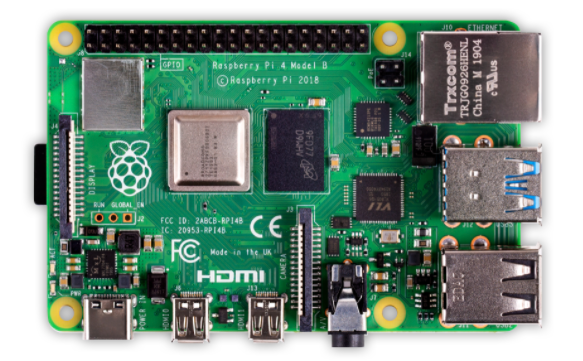
Well, to answer that, we need to understand how MAC addresses are formed. Each address is a series of byte values, in hexadecimal. They're assigned to hardware devices, most commonly to network interfaces. In the case of the Pis, this is the RJ45 Ethernet port you can see in the top right of this picture of a Raspberry Pi 4:
Significantly, the first three bytes in a MAC address represent the hardware manufacturer, via a so-called Organisationally Unique Identifier (OUI). And if we look at the canonical list of OUIs we see that there's an entry for the Raspberry Pi organisation thus:
DC-A6-32   (hex)        Raspberry Pi Trading Ltd
DCA632     (base 16)    Raspberry Pi Trading Ltd
                        Maurice Wilkes Building, Cowley Road
                        Cambridge    CB4 0DS
                        GB
How convenient!
Incidentally, the building in this address is named after one of the fathers of modern computing, Maurice Wilkes, who worked on one of the earliest stored-program computers EDSAC, and who also invented microprogramming, which was first described in Manchester in 1951.
So all we have to do is reduce the output of arp-scan by filtering the output to only show devices manufactured by the Raspberry Pi organisation, which has the OUI DC-A6-32, or, as it's more commonly written, dc:a6:32:
-> sudo arp-scan 192.168.86.0/24 | grep dc:a6:32
192.168.86.47   dc:a6:32:60:60:95       (Unknown)
192.168.86.15   dc:a6:32:60:60:77       (Unknown)
192.168.86.158  dc:a6:32:60:60:44       (Unknown)
192.168.86.125  dc:a6:32:60:60:e3       (Unknown)
->
Bingo!
DHCP leases had indeed been given out for hosts 47, 15, 158 and 125 in the 192.168.86.0/24 network, and there we have each associated MAC address too.
So in preparing for the networking setup, the MAC addresses went into the vars.yml file as shown earlier, with the to-be IP addresses.
Of course, we need to help Ansible find the Pis to make this configuration, and for that we need to specify a list of the existing IP addresses, which we now also have. Those go into the Ansible inventory, effectively a list of hosts in this simple case.
Based on the example.inventory in Jeff's repository, here's what we need for the setup in the case of our Brambleweeny cluster:
[brambleweeny]
192.168.86.47
192.168.86.15
192.168.86.158
192.168.86.125

[brambleweeny:vars]
ansible_ssh_user=pi
I've changed the name of the group from "Dramble" to "Brambleweeny", and of course adjusted the IP addresses to the as-is ones that exist right now. There's also a variable in this file, ansible_ssh_user, but we'll ignore that for now.
At this stage, we have found the Pis on the network, and gathered the appropriate information to supply to Ansible so that we can ask it to make the networking setup on each host, on our behalf.
We'll get to that in the next post. Until then, happy arping!
Next post in this series: Initial Pi configuration via Ansible
- ← Previous
Brambleweeny Cluster Experiments - Next →
Preparing the OS image